Electronics
The main electronic components are detailed below:
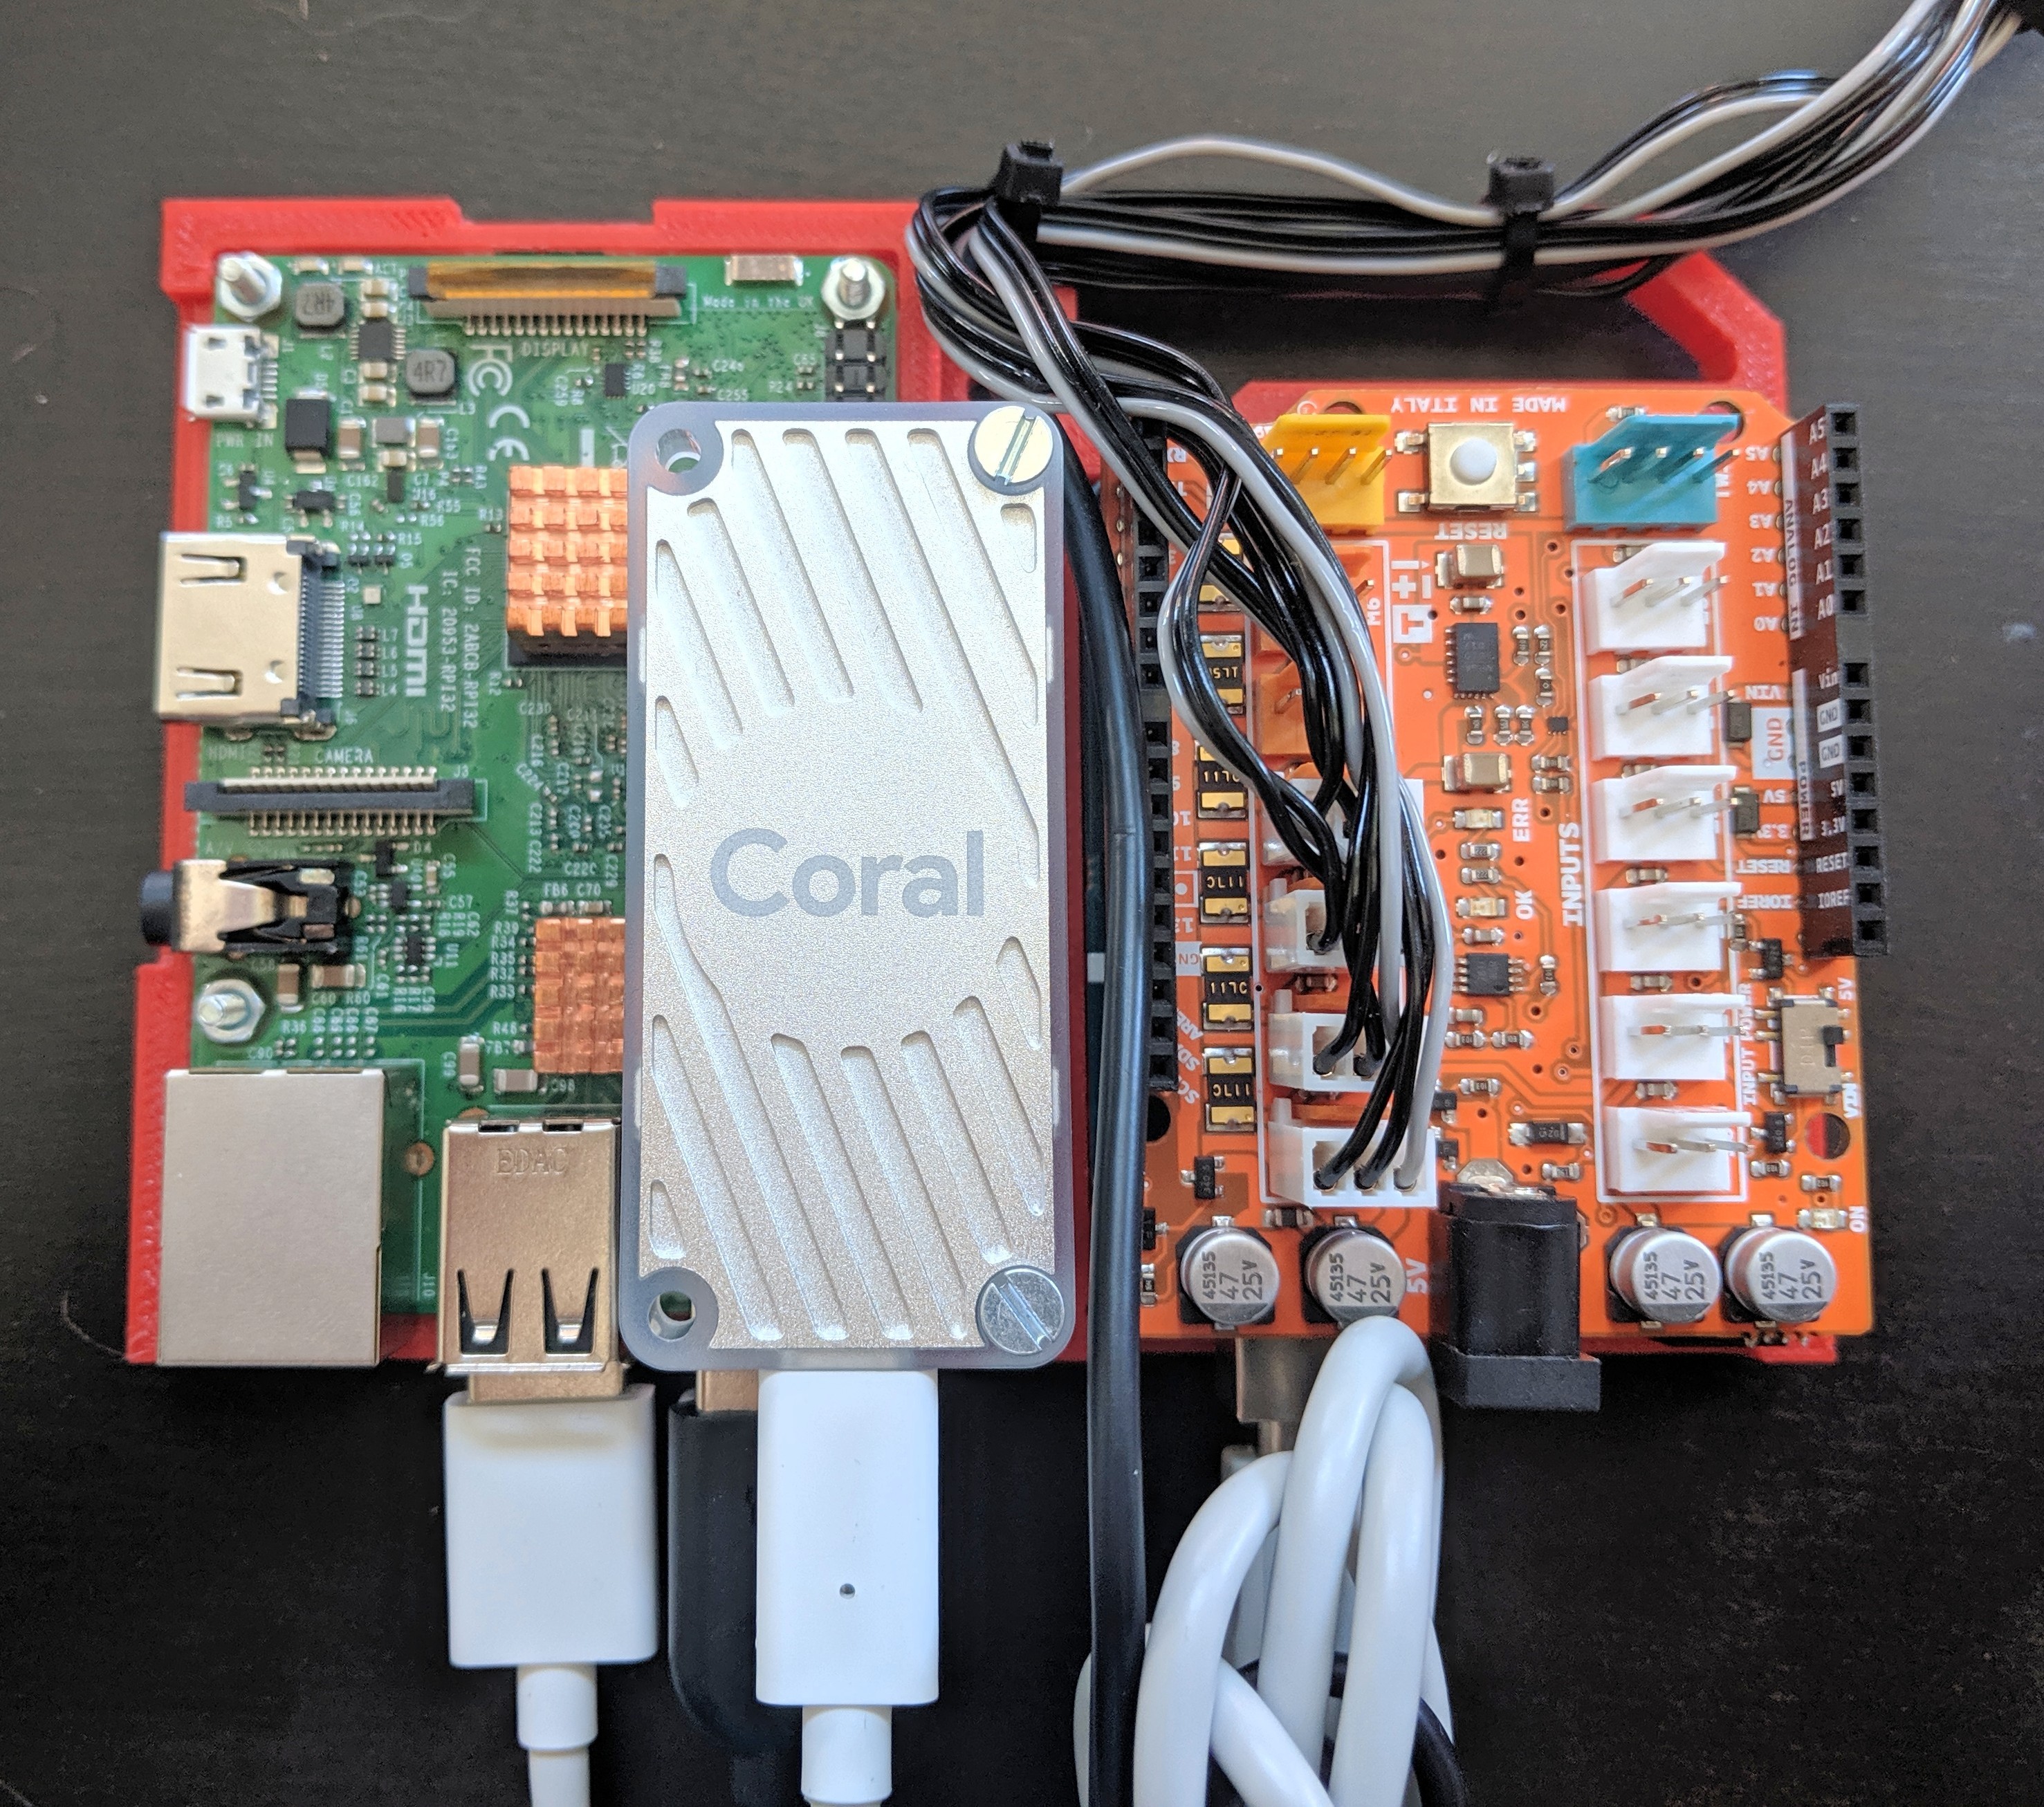
The corresponding Connection diagram of Braccio CamAI:
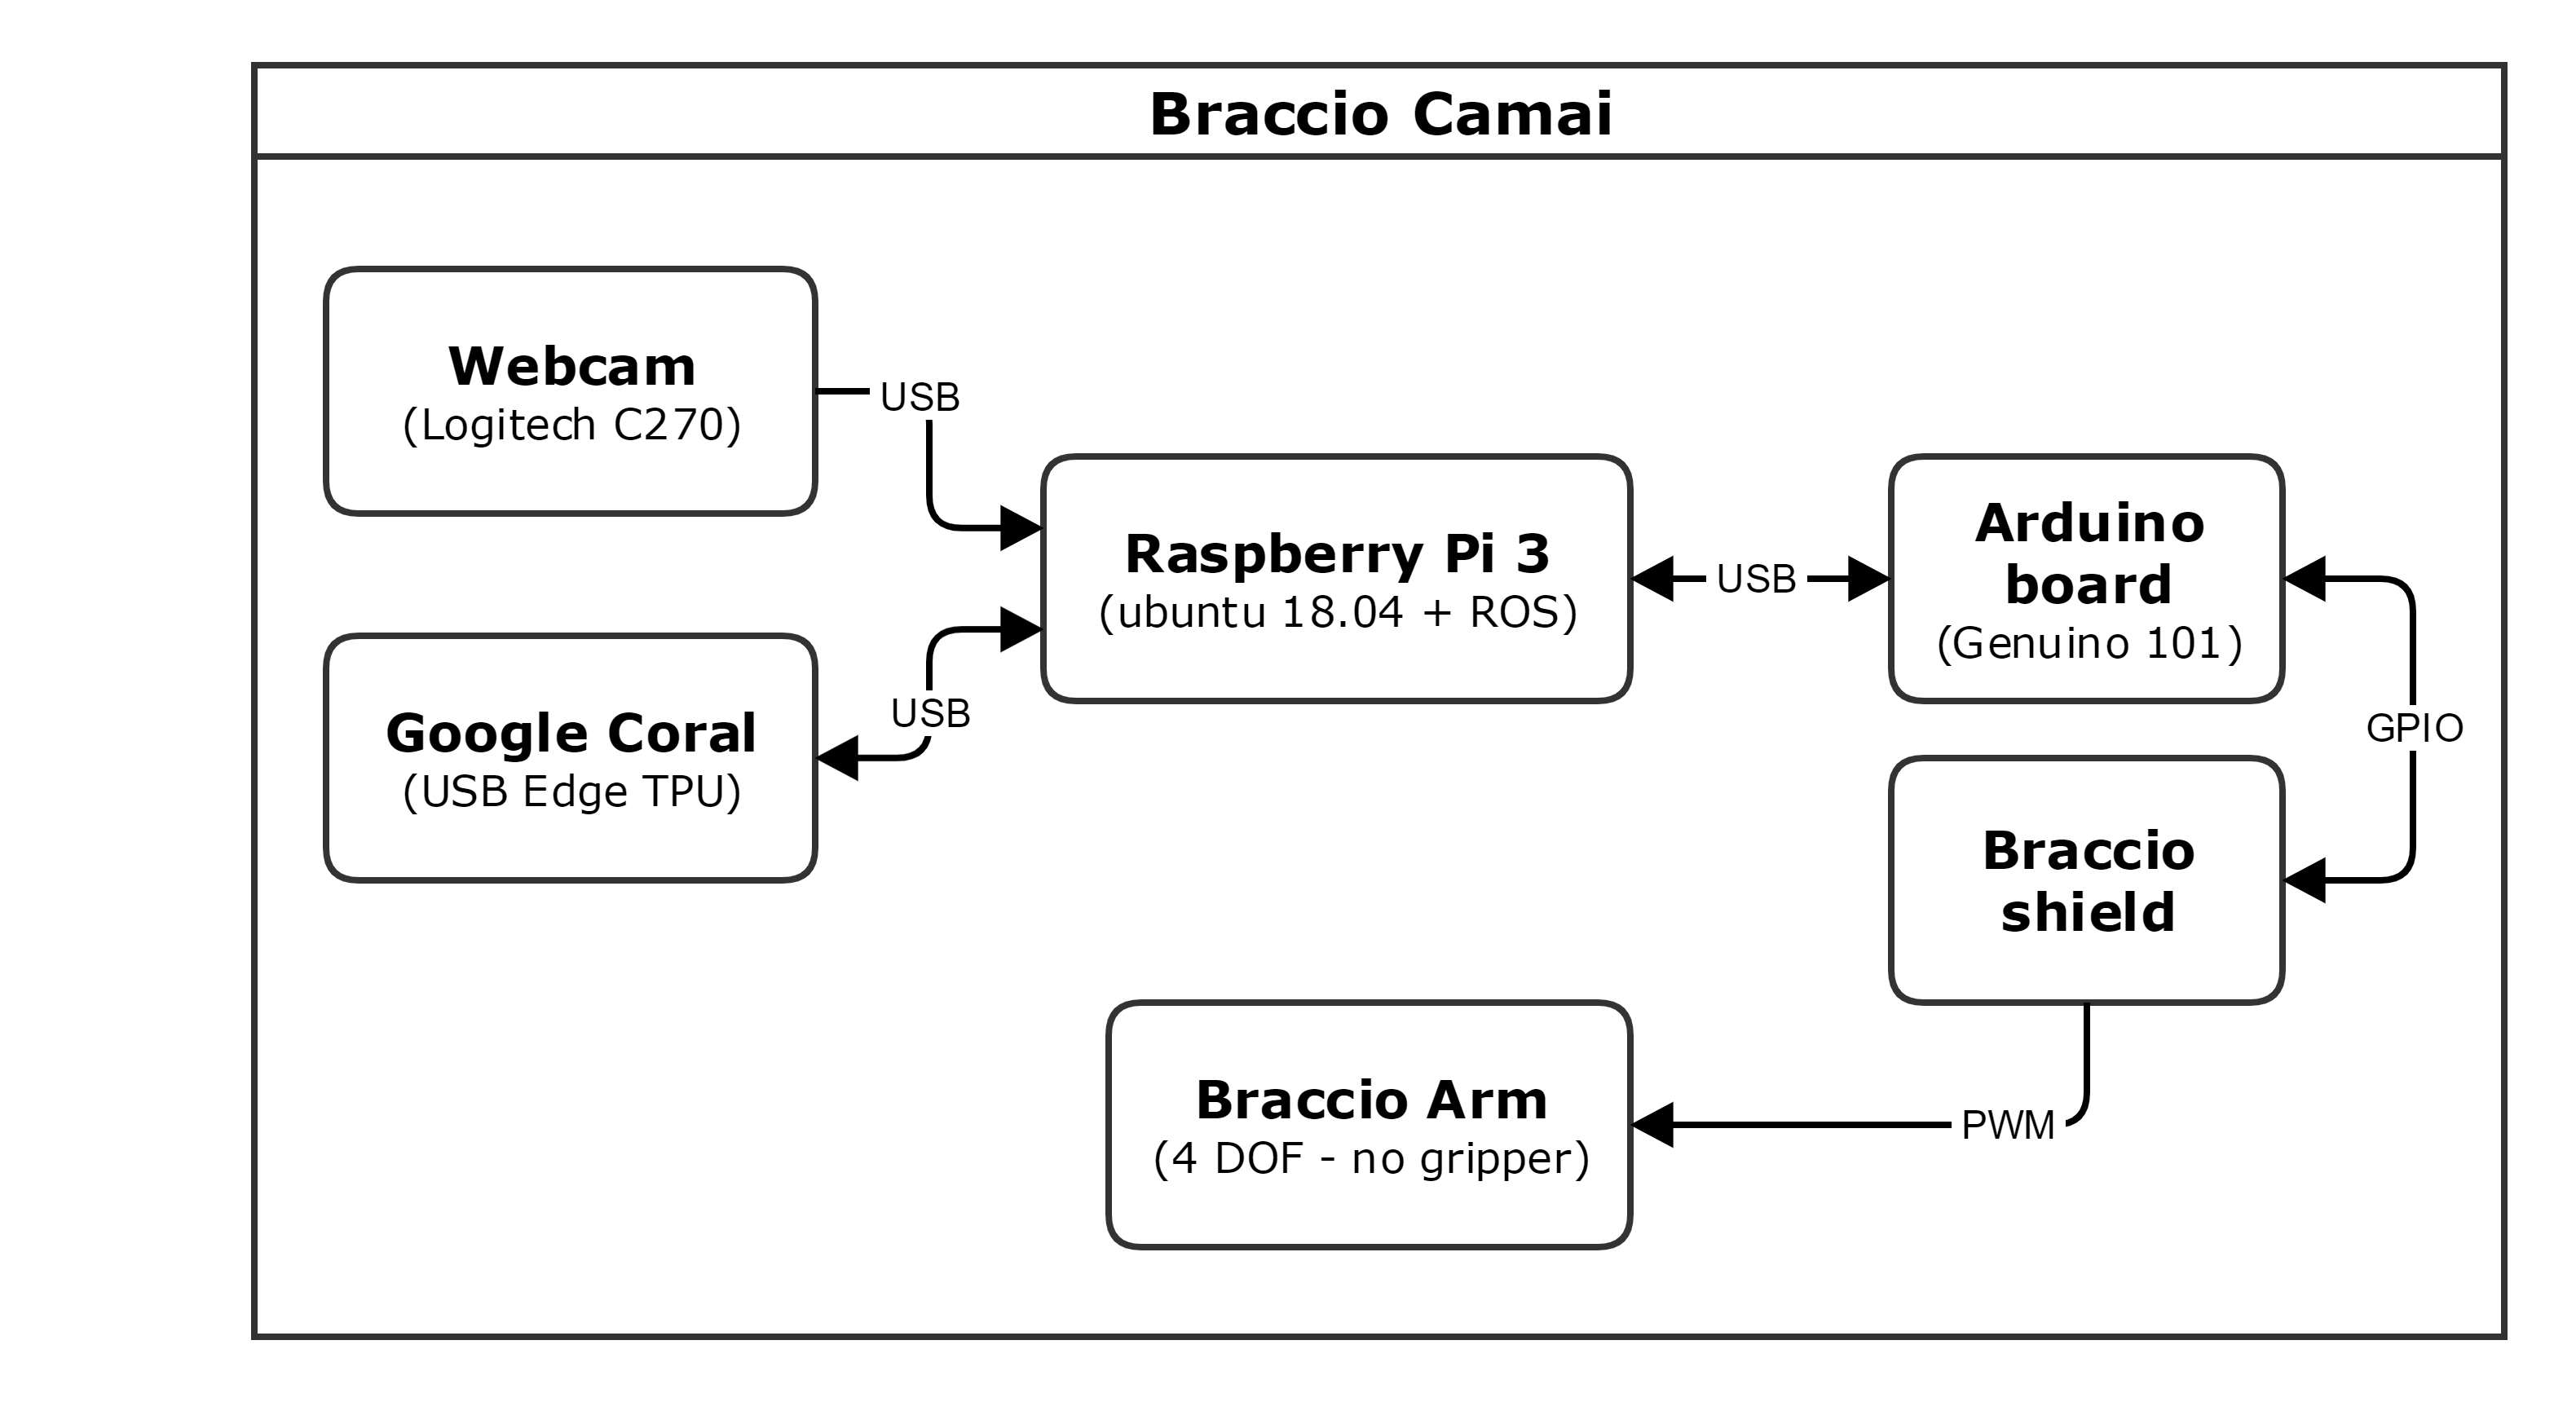
All main components are described as follows:
Raspberry Pi 3 Model B
We use the RP3 as main processor, in charge of receiving images from the camera, process it using a Google coral USB accelerator and generating the corresponding Joint commands for the arm. It runs Ubuntu 18.04 and ROS Melodic.
Currently, we are using a Raspberry Pi 3 Model B V1.2, but the software and electronic connections are compatible with the newer version RP3 Model B+, as well as previous version Raspberry Pi 2.
Important: The RP3 might get really hot. At full operation, Braccio CamAI uses approximately 65% of all CPU power. If you plan to have a long run-time operation, we suggest you to install an additional fan or cooling system.
We use a standard 2 Amp - 5 Volt power adapter for powering the Raspberry Pi 3.
A ready-to-use image will be available soon, manual instruction for installing ROS and melodic on RP3 are given as follows:
- Ubuntu 18.04 on RP3: Ubuntu-18-04-RaspberryPI.
- ROS Melodic on RP3: ROS Melodic Installation.
Arduino Board
For controlling the Braccio Arm, we use a Genuino 101, but any Arduino-compatible board should works as well.
The firmware can be directly installed using the Arduino IDE: Tools->Manage libraries and search for Braccio. Please install both Braccio and BraccioRobot.
Arduino compatible Shield
The Braccio robot arm already includes an Arduino-shield for sending PWM commands to all servo-motors. It must be separately powered using its own power plug, the power adapter is already included on the Braccio kit. We left intentionally unconnected the motors M5 and M6, since we do not want to use the gripper + last servo motor.
Google Coral USB Accelerator
To perform object detection and classification, we have attached a Google coral USB Accelerator to the RP3.
It has ready-to-use instructions described here: Google Coral USB Accelerator get-started guide.
During installation, please remember to disable the maximum operating frequency or install an additional fan, because the board itself might get really hot.